Branding Assets
WatanNetwork Branding Assets
Below are the building blocks for our brand. While this page is here to get you started.
WatanNetwork Watermark
Use these recommended guidelines when creating a channel branding watermark. Do not upload pictures containing celebrities, nudity, artwork, or copyrighted images since this violates our Community Guidelines.
- PNG file (no animated GIFs)
- 800 X 800 px image (recommended)
- Square or round image that renders at 98 X 98 px
To enable the Branding watermark, follow these steps:
- Go to My Channel
- Click the pencil icon on the right side of your Channel just below your banner and select Channel settings
- From left bar under Channel settings, click on Branding.
WatanNetwork PowerdBy
WatanNetwork Icons (for web)
Use these recommended guidelines when creating a new channel icon. Do not upload pictures containing celebrities, nudity, artwork, or copyrighted images since this violates our Community Guidelines.
- JPG, GIF, BMP, or PNG file (no animated GIFs)
- 800 X 800 px image (recommended)
- Square or round image that renders at 98 X 98 px
- Sign in to your YouTube account.
- On the left, select My Channel.
- Hover over your existing channel icon in the top left of your channel art banner.
- Click the edit icon
.
- Click Edit and follow the on-screen instructions to select the new image.
WatanNetwork Video Thumbnails

To upload a custom thumbnail when you upload a video:
- Record or upload your video.
- At the end of the video processing stage in the upload interface, you will see an option to choose a Custom thumbnail under the “Video thumbnails” section.
To upload a custom thumbnail for an existing video:
- Go to your channel Video Manager.
- Locate a video and click the Edit button.
- Click the Custom thumbnail button and upload a thumbnail.
- Once the thumbnail is uploaded, don’t forget to click the “Save Changes” button.
Your custom thumbnail image should be as large as possible, as the image will also be used as the preview image in the embedded player. We recommend your custom thumbnails:
- Have a resolution of 1280×720 (with minimum width of 640 pixels).
- Be uploaded in image formats such as .JPG, .GIF, .BMP, or .PNG.
- Remain under the 2MB limit.
- Try to use a 16:9 aspect ratio as it’s the most used in YouTube players and previews.
Channel Art Template

- On a computer, sign in to your YouTube account.
- In the left menu, select My Channel.
- Near the top of the screen, click Add channel art. If your channel already has channel art, just hover your mouse on the existing banner until you see the edit icon
. Then, click the icon and select Edit channel art.
- Upload an image from your computer or saved photos.
- You’ll see a preview of how the art will appear across different devices. To make changes, select Adjust the crop.
- Click Select.
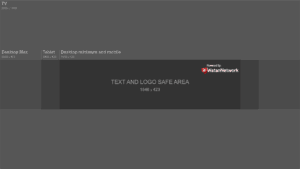
Channel art may look different on desktop, mobile, and TV displays. For the best results on all devices, we recommend uploading a single 2560 x 1440 px image.
- Minimum width: 2048 X 1152 px. This is the “safe area,” where text and logos are guaranteed not to be cut off when displayed on different devices.
- Maximum width: 2560 X 423 px. This means that the “safe area” is always visible; the areas to each side of the channel art are visible depending on the viewer’s browser size.
- File size: 4MB or smaller recommended.
If you’re not sure about the width and height of an image, download our Channel Art Templates above to see how images show on different devices. You can use your computer’s image editor or find one online to resize the imag


